Microsoft Outlook organizes your emails, calendar, contacts, tasks and to-do list, all in one place. The arrangement will start with your email account. From there, you can start working with emails, turn emails into tasks or appointments, and store information about the people you interact with in your contacts so you never have to memorize your email address or phone number. Just following 7 these steps to set up a POP/IMAP email account in Microsoft Outlook 2016
Step 1:
After logging in to Outlook 2016, you need to click on File> Add Account section on the upper left.

Step 2:
You can then proceed by selecting Manual Installation or additional server types.

Step 3:
As you will see in the image below, you have to choose POP or IMAP from options that shown on a new window.
Step 4:
In this step, there are 2 important points to watch out for.
IMAP: Executes all incoming and outgoing mail on the server. It can be expressed as simultaneous synchronous operation. (If the mail size is too low, installation with this protocol can quickly fill your mail.
POP: All incoming and outgoing mail is processed through your computer, so your incoming mail server downloads your computer and your sent mail is not stored in the web server.
Step 5:
Once you have filled in your details, you can choose the settings shown from Other Settings > Outgoing Server .
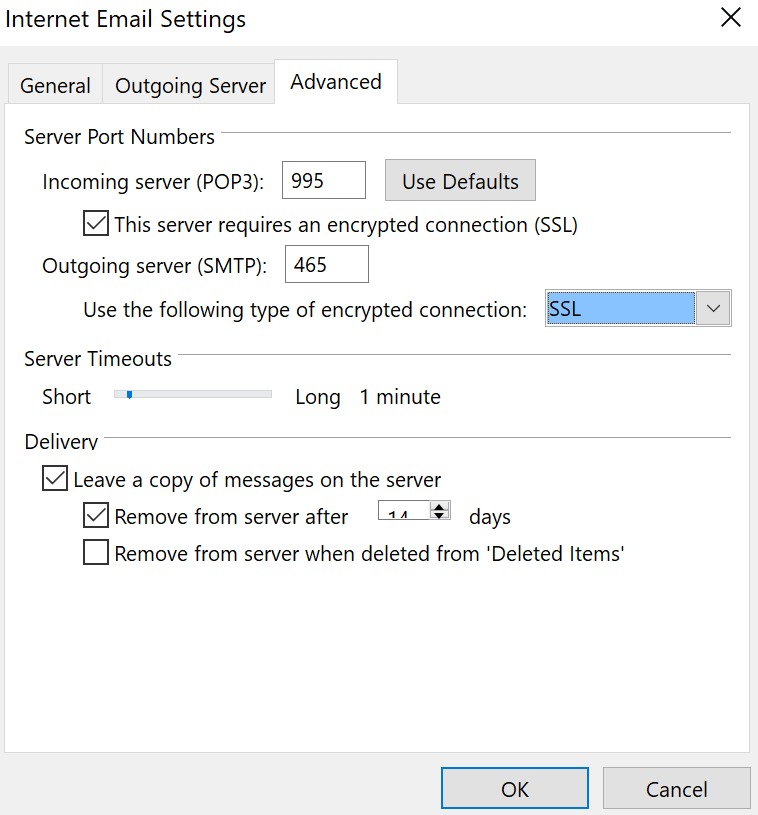
Step 6:
You can make the following settings via the Other Settings> Advanced menu.
Incoming Mail Server “110” or “995” (SSL)
Outgoing Mail Server “587” or “465” (SSL)
Step 7:
Finally, once you’ve saved all the settings and then click “Test Account Settings ” as shown in the picture, the setup process will be completed and you will be able to start using Outlook 2016.