MySQL is a free and open source software used to manage databases on a computer. MySQL can be installed on many different operating system platforms such as Windows, Linux and Mac OS X. In this article, we will guide you to install MySQL in CentOS 7 using command line on server.
What you need to prepare before installing:
– Root access to your server.
– CentOS 7 was installed on your server.
Step 1 – Download and prepare the MySQL repository
To start, you should connect to your server via SSH and prepare the commands below for use in the command line.
First, you need to check if the system is up-to-date and up-to-date if needed. Type the following command:
sudo yum update
Waiting for system updates. Then install MySQL repositories. You can find the latest version here: https://dev.mysql.com/downloads/repo/yum/). Type the following command:
wget http://mysql.com/get_mysql57-community-release-el7-9.noarch.rpm
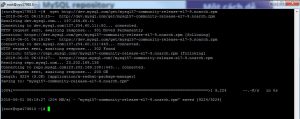
Once loaded, you will see that the .rpm file has been saved.
Now you can prepare the repository and install MySQL packages from it. Type the command:
sudo rpm -Uvh mysql57-community-release-el7-9.noarch.rpm
You will likely see the same result:
When you see that it reaches 100%, you will be able to start installing MySQL CentOS 7. Detailed instructions will be in the next step.
Step 2 – Install MySQL on the server
Now you can install MySQL right from this command line:
sudo yum install mysql-server
A list of files will be given and you will receive a confirmation message to download them. Type y, and then press ENTER to continue.
# yum install mysql-server
Loaded plugins: fastestmirror, security
Setting up Install Process
Determining fastest mirrors
epel/metalink | 3.7 kB 00:00
* epel: fedora.mirror.serversaustralia.com.au
base | 3.7 kB 00:00
epel | 4.7 kB 00:00
epel/primary_db | 6.0 MB 00:00
extras | 3.4 kB 00:00
updates | 3.4 kB 00:00
updates/primary_db | 8.1 MB 00:03 …
Resolving Dependencies
–> Running transaction check
—> Package mysql-server.x86_64 0:5.1.73-8.el6_8 will be installed
–> Processing Dependency: mysql = 5.1.73-8.el6_8 for package: mysql-server-5.1. 73-8.el6_8.x86_64
–> Processing Dependency: perl-DBI for package: mysql-server-5.1.73-8.el6_8.x86 _64
–> Processing Dependency: perl-DBD-MySQL for package: mysql-server-5.1.73-8.el6 _8.x86_64
–> Processing Dependency: perl(DBI) for package: mysql-server-5.1.73-8.el6_8.x8 6_64
–> Running transaction check
—> Package mysql.x86_64 0:5.1.73-8.el6_8 will be installed
—> Package perl-DBD-MySQL.x86_64 0:4.013-3.el6 will be installed
—> Package perl-DBI.x86_64 0:1.609-4.el6 will be installed
–> Finished Dependency ResolutionDependencies Resolved
================================================================================
Package Arch Version Repository Size
================================================================================
Installing:
mysql-server x86_64 5.1.73-8.el6_8 base 8.6 M
Installing for dependencies:
mysql x86_64 5.1.73-8.el6_8 base 895 k
perl-DBD-MySQL x86_64 4.013-3.el6 base 134 k
perl-DBI x86_64 1.609-4.el6 base 705 kTransaction Summary
================================================================================
Install 4 Package(s)Total download size: 10 M
Installed size: 29 M
Is this ok [y/N]: y
You will see the download process as follows:
Downloading Packages:
(1/4): mysql-5.1.73-8.el6_8.x86_64.rpm | 895 kB 00:00 …
(2/4): mysql-server-5.1.73-8.el6_8.x86_64.rpm | 8.6 MB 00:01 …
(3/4): perl-DBD-MySQL-4.013-3.el6.x86_64.rpm | 134 kB 00:00 …
(4/4): perl-DBI-1.609-4.el6.x86_64.rpm | 705 kB 00:00 …
——————————————————————————–
Total 3.8 MB/s | 10 MB 00:02
Running rpm_check_debug
Running Transaction Test
Transaction Test Succeeded
Running Transaction
Installing : perl-DBI-1.609-4.el6.x86_64 1/4
Installing : perl-DBD-MySQL-4.013-3.el6.x86_64 2/4
Installing : mysql-5.1.73-8.el6_8.x86_64 3/4
Installing : mysql-server-5.1.73-8.el6_8.x86_64 4/4
Verifying : perl-DBD-MySQL-4.013-3.el6.x86_64 1/4
Verifying : mysql-server-5.1.73-8.el6_8.x86_64 2/4
Verifying : mysql-5.1.73-8.el6_8.x86_64 3/4
Verifying : perl-DBI-1.609-4.el6.x86_64 4/4
Wait for the installation to complete. Result:
Installed:
mysql-server.x86_64 0:5.1.73-8.el6_8Dependency Installed:
mysql.x86_64 0:5.1.73-8.el6_8 perl-DBD-MySQL.x86_64 0:4.013-3.el6
perl-DBI.x86_64 0:1.609-4.el6Complete!
If you see the word “Complete!” At the bottom of the page, means that MySQL has been successfully installed on the server.
Step 3 – Run MySQL and see if it works
MySQL is not booted after installation, so you need to boot with the following command:
sudo systemctl start mysqld
Wait a few seconds. You will not receive a response to MySQL startup, so check the following:
sudo systemctl status mysqld
The result of the MySQL status will be as follows:
If you see MySQL active and running as shown above, you have successfully installed MySQL and have started MySQL on the server.
Summary
You have completely installed MySQL on CentOS 7 server. From now on you can store databases on it to manage them or using them to build websites or web applications.


